




The Pixie: The trending haircut for autumn 2026
Published date 24 September 2026
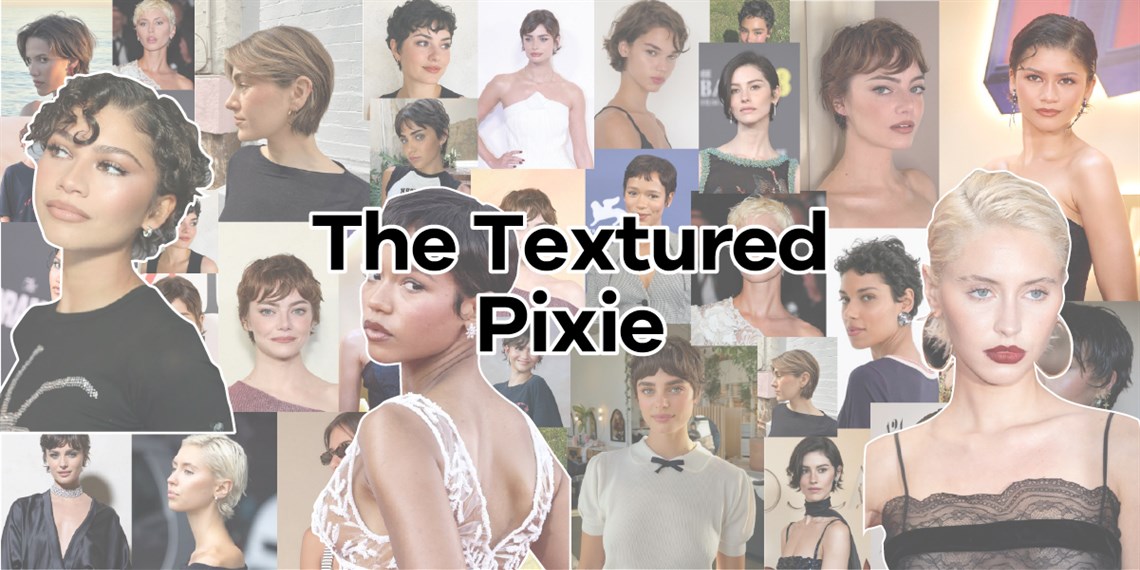
The textured pixie is making a statement this autumn
The cut that’s short, fresh, but full of personality? The textured pixie. This cut is making its way onto the salon floor this autumn, bringing a softer and more versatile take on the classic short cut. Rather than creating sharp, solid shapes, this modern pixie cut brings layers, movement, and, of course, texture. The result is short and edgy, but with enough length through the crown to create lift, curl and movement that can be styled in different ways. Style icon and ultimate trendsetter Zendaya has been seen flaunting this trendy cut on the red carpet, and we couldn’t be more obsessed!
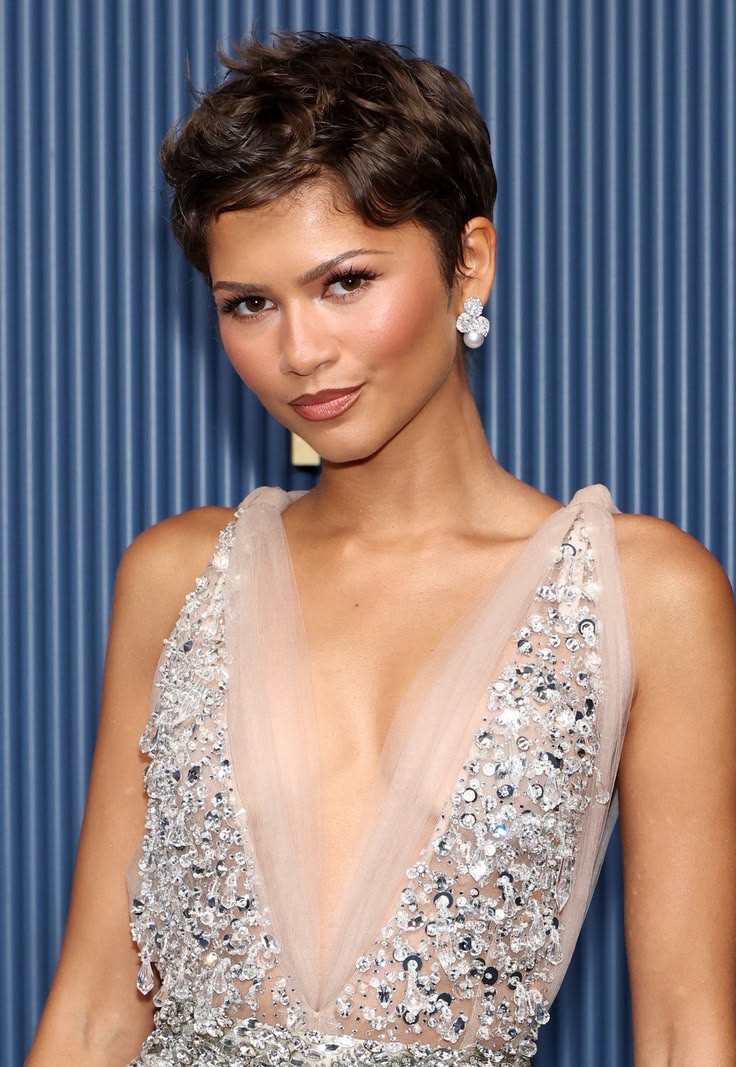
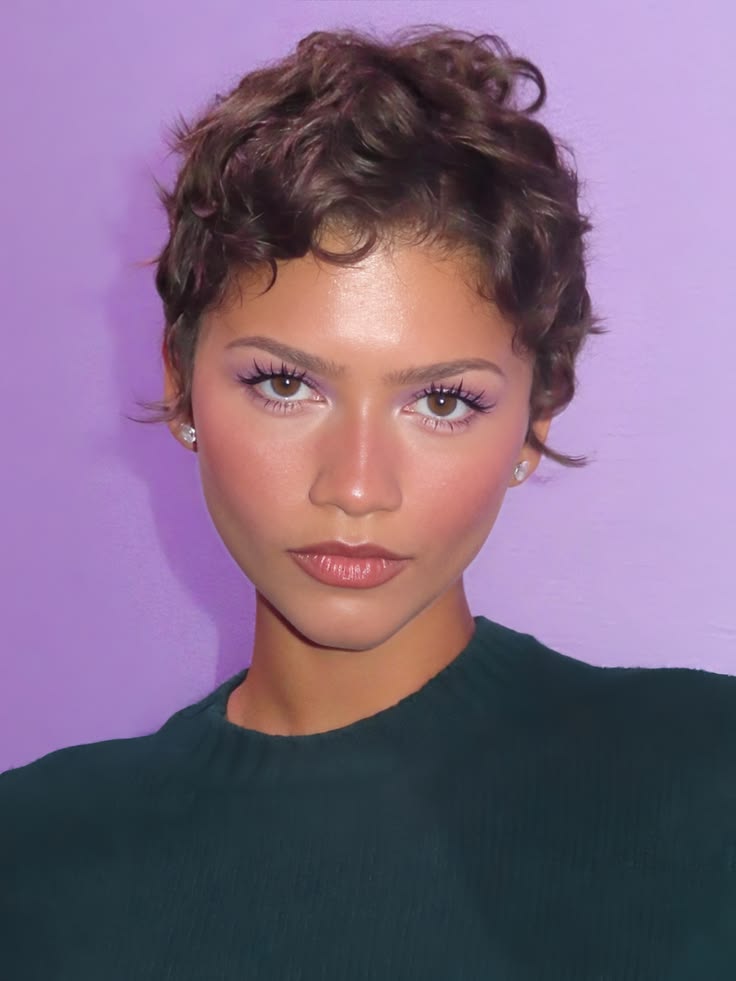
For clients looking to make a statement with their next cut, the textured pixie is a look that puts your client's natural texture and facial features front and centre! Let’s jump into what the textured pixie is and how you can create it with your clients.
What is a textured pixie?
A textured pixie is a short haircut built around movement rather than its structure. While a traditional pixie can feature a tighter and more uniform shape, the textured version keeps more length through the crown, creating broken layers and individual pieces that can be lifted, curled or bent. The key to a textured pixie is balance. The nape and sides stay clean and tapered, while the crown remains longer and more disconnected to give the finished look its signature texture. It’s a short cut, but far from one-dimensional.
How to cut a textured pixie
When approaching the textured pixie, think of a soft graduated or tapered pixie with a longer, disconnected crown.
- Start with sections
Begin with a centre profile section from the forehead to the nape, followed by a centre-back section. Create a horseshoe section around the crown to separate the longer top from the shorter areas.
This will give you clear control over where you want to keep length and where you want to create your taper.
- Start at the nape
Begin underneath the occipital bone, keeping the hair tight and close to the head. The aim is a clean, tapered nape without creating a hard undercut or obvious disconnect. Work upwards towards the occipital area, following the natural shape of the head.
- Create a soft taper
Working from the centre outwards, take horizontal sections and follow the natural head shape. Gradually build the graduation as you reach the occipital bone, keeping everything soft and seamless. Avoid creating a heavy shelf around the occipital area, as this can leave the finished cut looking bulky.
- Move on to the sides
Create a section from the temple towards the top of the ear. Keep the hair short around the ear, but retain enough softness for the ears to show through naturally. Unlike a more traditional pixie, avoid taking the sides too short. The perimeter should feel soft rather than overly exposed.
- Build the transition into the crown
Take vertical sections towards the crown, using scissor-over-comb or controlled point cutting to remove weight. Progressively retain more length as you move towards the crown, but resist the temptation to over-connect the two areas. That subtle disconnection is what allows the crown to retain its movement and personality.
- Keep the crown long enough for movement
The crown is where this pixie really comes to life! The ideal length will depend on the client's density, natural curl pattern, and desired finish. Making sure to keep 4 inches through the crown can give you plenty of versatility.
Take your central section as your guide, then pivot outwards to establish the desired length. The crown needs enough hair to:
- Lift
- Curl
- Bend
- Separate
- Fall forwards
- Be styled piece by piece
This is where your texture will come from, so don’t remove any more than you need to!
Don’t over-connect the crown
Once you’ve established your length, connect the sides into the crown using broken, freehand layers rather than creating a heavy, obvious line. Freehand texturing allows you to follow the way the client’s hair naturally wants to fall, while retaining some weight so individual pieces can sit separately.
Remember! The goal isn’t fluffy texture; it’s soft, controlled texture with an edgy finish.
Always check the cut once dry
With a textured pixie cut, the final shape isn’t fully revealed until the hair is dry. That’s why it’s super important to check the cut once it's been dried! Dry the hair with its natural movement, using flat clips where needed to encourage bend and direction. Once dry, reassess the shape and look at three key areas:
- The crown
Look at the movement, height and texture
- Sides
Are they clean, close, and soft?
- Nape
This area should be tight, tapered, and seamlessly blended
From here, you can personalise the texture to suit the client's natural curl pattern. The important thing is not to over-texturise. Too much removal of the hair can make it feel fluffy and take away from the defined, piecey finish you’re trying to create.
How to style a textured pixie
The best styling approach is to work with the client's natural texture rather than against it. Start with a hydrating shampoo and conditioner to enhance its natural movement. Apply a curl or texture mousse or gel to encourage definition before drying the hair into place. A sea salt spray, such as the Shed Beach Bum Sea Salt Spray, can be used to enhance separation and create that effortless, lived-in texture. For a softer finish, allow individual pieces to fall naturally rather than trying to make every section uniform. And don’t forget, the less perfect, the better!
Ready to create a textured pixie in the salon?
The textured pixie proves that going shorter doesn’t mean sacrificing versatility. With a tapered nape, soft sides and a longer, broken crown, the cut can be adapted to the client’s face shape, density and natural texture, while still giving them plenty of ways to style it.
For hairdressers, it’s the chance to create a genuinely personalised short cut. A haircut where the shape, texture and natural movement all work together, perfect for the new season.

Comments
There are currently no comments, be the first to comment.